EL-Nikkor lenses are great values for cost-conscious photographers. They are excellent quality, but also very inexpensive and widely available on eBay. With the advent of digital photography and photoshop, darkrooms are being liquidated. EL-Nikkor are especially useful for macro photography as an alternative to a dedicated macro lens, though you’ll need bellows or a focusing helicoid with extension tubes. For macro, they are particularly suited to flat objects like postage stamps. They are also used in UV photography because they pass UV wavelengths better than regular lenses. They are very high quality glass despite the small size and obsolesce of enlarging. The simple construction and relative low cost of these lenses makes them good candidates for rehabilitation should they become contaminated with dust or fungus. They also make good “starter” lenses exploring lens construction and servicing.I purchased my lens for experimentation in UV and macro. I got a good price because it had some “dust” inside. Unfortunately, the dust was actually fungus. The fungus did not appear to be extensive. Anyway, dust or fungus I was going to end up cleaning it internally all the same. There are instructions and written descriptions of how to disassemble EL-Nikkor on the internet, but none were illustrated with photographs. I wish I had photographs, because the descriptions were not clear enough and I made a few wrong turns trying to sort it out. For the good of the order, let me present what I learned.
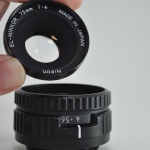
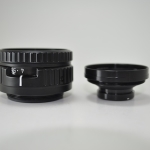


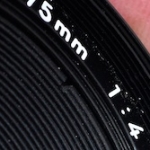
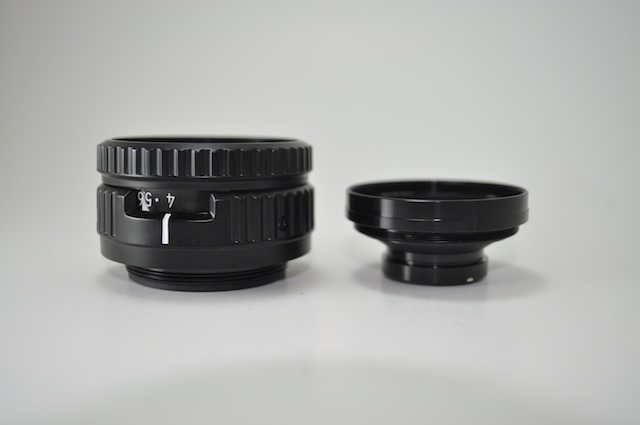
I am working mainly with the EL-Nikkor 75mm f/4 N, shown in the steps below. The N refers to the “new” model with plastic housing. The older 75mm f/4 has a metal housing. The easiest way to tell from a picture is that older model EL-Nikkor (pictured to the left) has large notches on the grip surface for the aperture ring, whereas the N is the same all the way around. Disassembly of older, metal EL-Nikkors is similar in that front and rear elements unscrew either by spanner wrench or rubber grip; however, the threaded ring on the rear is fixed in the metal models, so that section of this tutorial does not apply.
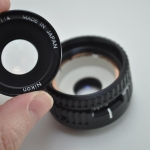
The 75mm f/4, old or new, is a simple design of four elements, glued in two pairs, one pair in front, the other in back. All EL-Nikkors are generally simple construction; the 75mm f/4 has four elements, but some EL-Nikkors, such as the F/2.8 models, have six elements. Four elements may be better for UV (less glass means less UV light loss), but for macro photography they say lenses with more elements are better. Wikipedia has a listing of EL-Nikkor lenses.
To disassemble the EL-Nikkor for cleaning
Work in a clean environment. The biggest challenge in this process is reassembling the lens without trapping dust inside.
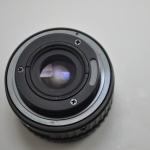
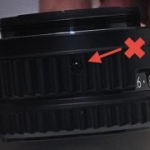
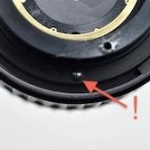
IMPORTANT: Do not remove the three screws on the barrel. These are part of the aperture selection system, and do not need to be disturbed to clean the interior.
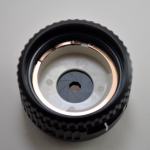
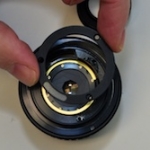
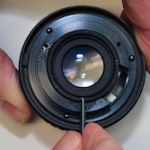
The bottom set of elements can be unscrewed with a lens spanner tool or screwdriver, without further disassembly. (I was able to remove it with my fingernails in the spanner slots.)
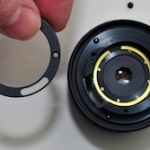
Note that there is a loose brass washer between the elements and the housing for the aperture blades in both the top and bottom element chambers; don’t lose them.
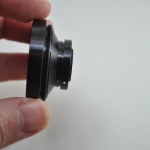
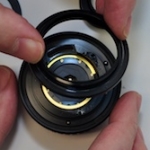
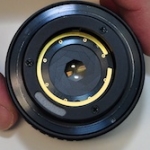
Removing the threaded base. Removing the base is not necessary to remove the rear elements, though it does expose them for better access should you have difficulty unscrewing the rear elements. Note that in the older, metal-housing El-Nikkors the threaded ring does not separate from the body, at least in the EL-Nikkor 50mm f/4 and f/2.8 that I have experienced.
To separate the element pairs
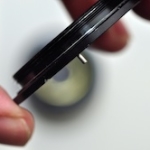
Fortunately for me, the fungus was limited to a few small spots in the interior lens pairs’ surfaces. It was easily cleaned with hydrogen peroxide and lens cloth, finishing with a lens pen after everything was dry. I cannot see any permanent etching or damage to the lens surface. As a further measure, I left the lens in a sunny window for a few days. However, in some cases, the fungus can grow in the glue between glued elements. Separating glued elements is a radical procedure best avoided. Try sunlight to reduce the fungus first.
I have not attempted to separate glued lens elements myself, but here’s what my research tells me. The glass lens pairs are held in place in their metal housing by retaining rings that can be removed with a lens spanner. The glass lens pairs are held together by a cement, often balsa in older lenses. Balsa can be softened in hot water. More recent lenses will have a different adhesive that will need to be removed with a solvent containing methylene chloride. But then you’ll have to re-glue it–just placing them together unglued will not work because the thin layer of air trapped between the lens elements will cause rainbow moire circles. Here’s some information on lens cement.